My Homelab Journey: Connecting My NAS to the Server
HomeLab
April, 2024
6 minutes
In the Previoues Article, I discussed how I managed to duplicate my data safely even though my two-bay NAS couldn't support a traditional RAID setup. In this article, I'll focus on the software aspect of my home lab. I'll explain in details how did I connected my NAS to my server to use it as a network storage for backups and media.
Setting Up a Network Share on Your Synology NAS
To effectively manage data storage on your Synology NAS, it's essential to create distinct shared folders for each of the four volumes previously established. Here’s how you can set them up:
- Access the Control Panel: Start by logging into your Synology NAS interface and opening the Control Panel.
- Navigate to Shared Folders: Within the Control Panel, find and select the ‘Shared Folder’ section. This is where you can manage and create new shared folders.
- Create Shared Folders: For each of the volumes — Media 1, Media 2, Backup, and Backup Clone — create a new shared folder. Ensure each folder is correctly assigned to its corresponding volume:
- Media 1 shared folder on Disk 2
- Media 2 shared folder on Disk 1
- Backup shared folder on Disk 1
- Backup Clone shared folder on Disk 2
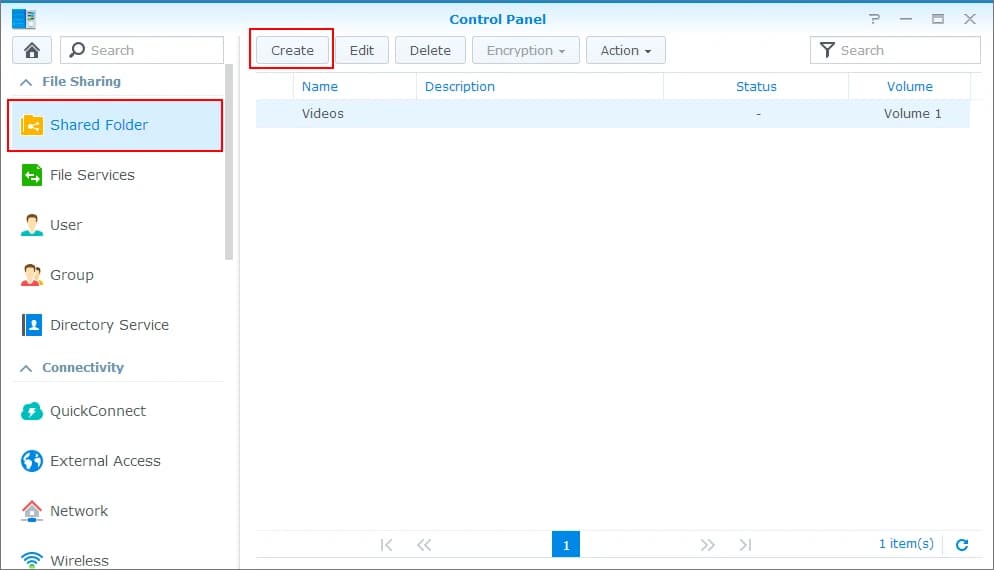 A picture that shows the Synology NAS control panel on the Shared folder tab
Configuring User Permissions for Shared Folders
- Create a New User: Open the Control Panel on your Synology NAS and Navigate to the User section and select Create to add a new user. Fill in the required details to set up the user account.
- Assign Permissions: After creating the user, return to the Shared Folder section in the Control Panel. For each shared folder (Media 1, Media 2, Backup, and Backup Clone), edit the permissions settings. Grant the newly created user full access to all these shared folders. This includes read, write, and modify permissions.
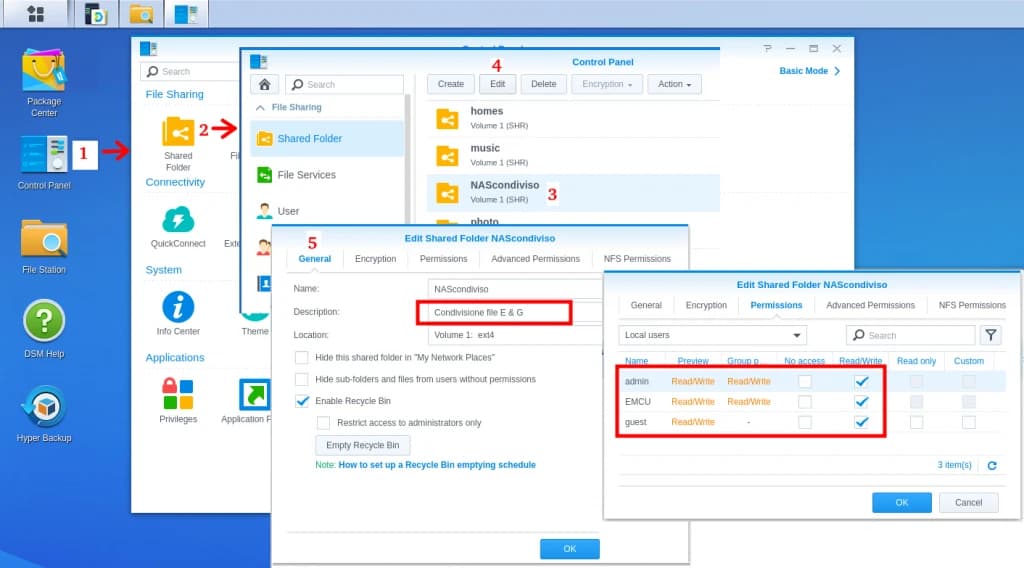 A picture that shows the steps of changing the permissions for a shared folder
Configuring Your Server to Access Network Shares via CIFS
Returning to our server, to utilize the shared folders we've set up, we need to implement CIFS (Common Internet File System), the protocol for accessing network files. To enable this, we must run the following commands on our Linux server. These commands will update the list of available packages and install the necessary tools for CIFS connectivity, specifically the CIFS utilities and NFS common packages:
sudo apt-get update
sudo apt-get install cifs-utils nfs-common
Configuring the Mount Directory and Credentials
To securely store your user credentials, we'll save them in a file located at ~/.smbcredentials. This file will be used by CIFS to access the network share.
To create and edit this file, use the nano editor:
nano ~/.smbcredentialsIn the editor, input the following content, substituting USERNAME and PASSWORD with the credentials of the user you created on your NAS:
username=USERNAME
password=PASSWORD
Next, we'll prepare the directories that will map to the network shares. We'll use the /mnt directory for this purpose:
mkdir /mnt
mkdir /mnt/media-1
mkdir /mnt/media-2
mkdir /mnt/backup
mkdir /mnt/backup-clone
This setup ensures that your credentials are stored securely and that your mount points are organized and ready for network sharing.
Mounting the Network Share
Let's assume that your Synology NAS IP is 192.168.0.100 Now that we already prepared the username and password to access the network share and we created the required folders, we can simply execute the following command to mount the folder
sudo mount -t cifs -o credentials=~/.smbcredentials,uid=1000,gid=1000,file_mode=0777,dir_mode=0777 //192.168.0.100/backup /mnt/backup
sudo mount -a
This command will link the 192.168.0.100/backup share folder to the /mnt/backup directory we prepared, using the correct permissions and the ~/.smbcredentials file we created earlier.
However, this setup is temporary and will require re-execution after each system reboot.
Making the Mount Permanent
To ensure the network folder is permanently mounted, we will use a similar command in the /etc/fstab file: Open the file in nano:
sudo nano /etc/fstabFor each shared folder, add a line like this:
//192.168.0.100/backup /mnt/backup cifs credentials=~/.smbcredentials,uid=1000,gid=1000,file_mode=0777,dir_mode=0777 0 0Since we have four shared folders, you'll need to add four lines, one for each. After adding the lines, save the /etc/fstab file and execute:
sudo mount -aThis addition will ensure that all specified mounts are re-established automatically upon each system reboot, making your configuration persistent.
Testing the connectivity
To verify that everything has been configured correctly, simply navigate to any of the network shared folders you created under /mnt. For example, to test the /mnt/backup directory, you can try creating a new folder or file there. This can be done using the following command:
mkdir /mnt/backup/testfolder
touch /mnt/backup/testfolder/testfile.txt
These commands will create a new folder named testfolder and a new file named testfile.txt within it. If these operations succeed without errors, it confirms that the network share is properly set up and accessible.
Upcoming: My Top Picks for Self-Hosting Software
In the next article, I will share my favorite software for self-hosting. I’ll provide a brief overview of each choice and discuss how we can effectively utilize our network folders with Docker volumes. This will help you optimize your home lab setup for better performance and efficiency.